
Sweet Evening Breeze
Tuesday, June 18, 2019
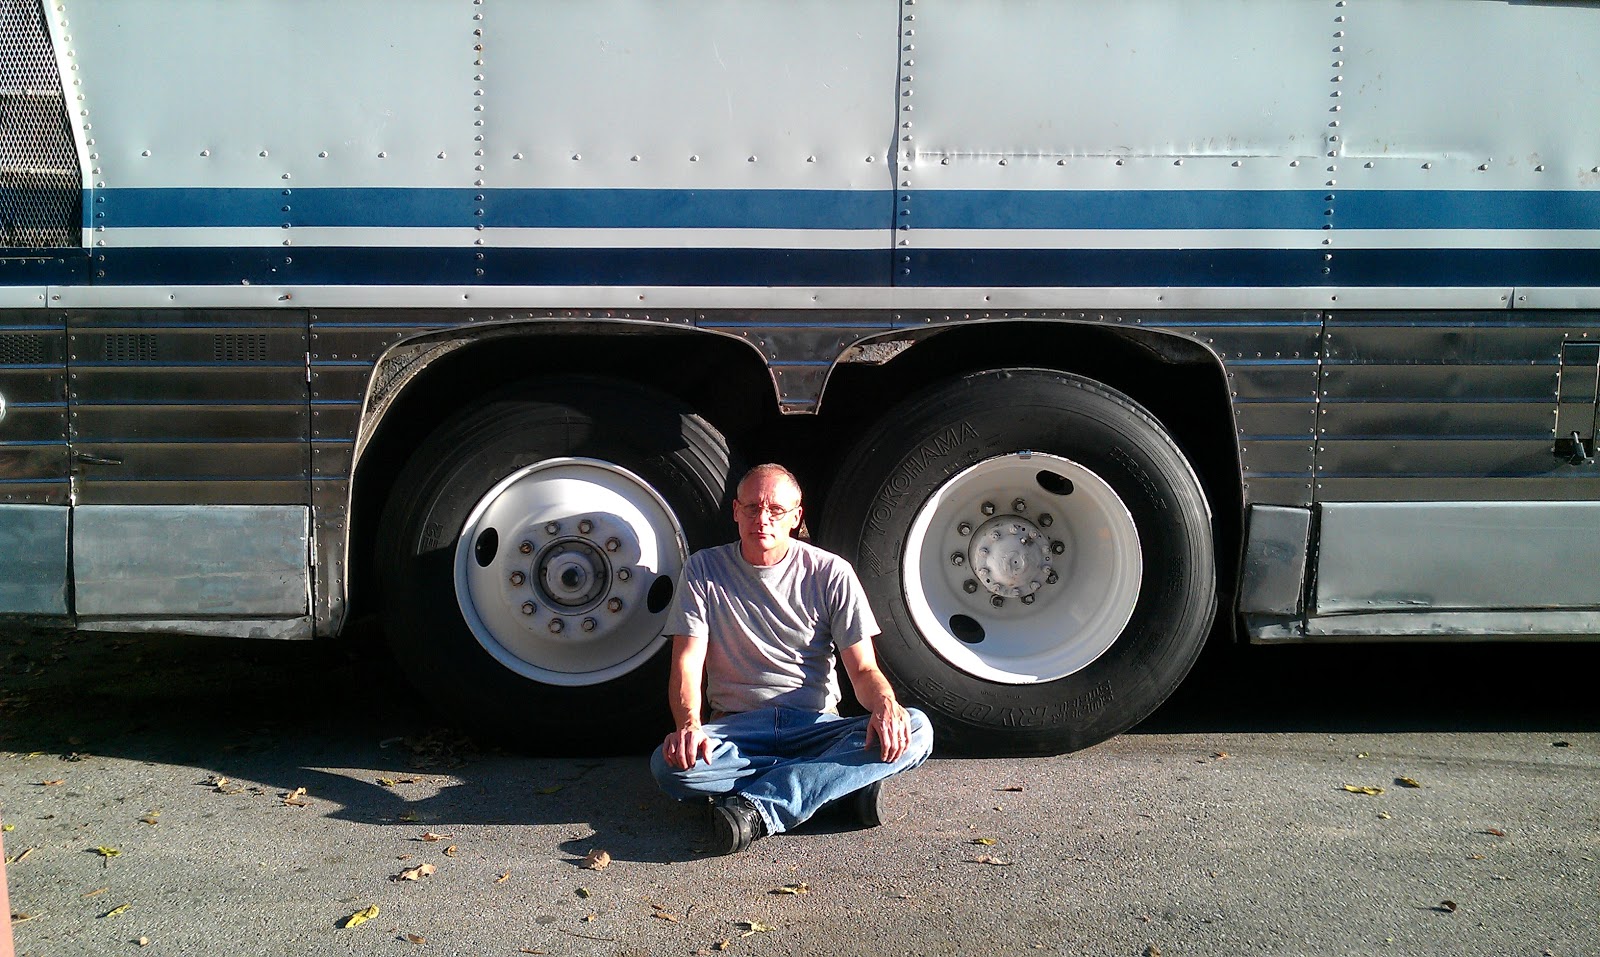
Closing a chapter in my bus conversion adventure. Saturday, Jun 15th 2019 the new owners took possession of Sweet Evening Breeze. They are a younger couple with prior bus conversion experience and were tickled to have her. Hopefully they will be able to do what I was not able to and have many enjoyable miles. It was with mixed emotions that I watched her pull away and head to her new home.
Sunday, September 7, 2014
Today Barry and I took the bus out for a little drive. We drove down to Berea KY on I-75. There is a small independent truck stop at the second exit. When we
do this little jaunt we stop there and eat lunch. The round trip is approx 78 miles or so. The bus ran flawlessly, as usual. The weather was great. I think the hi today was 78 and partly sunny with a cool 58 this morning. Perfect bus driving weather since the bus doesn't have any a/c and only the defroster for heat.
Once again there is no picture with the posting... I keep forgetting to take pictures.
Monday, May 26, 2014
 Today I pulled the bus out and gave her a good washing, top to bottom. My ladder was not tall enough for me to actually climb on top to scrub like I wanted to but I was able to get up on the sides of the top where you can see, at least.
Here is my friend Scotty helping me by hosing off what I have washed.
 This is a picture of me washing one of the stainless panels. I did not realize just how much of a job this actually was and by the time I was finished I hurt all over. This job surely took a toll on my back and knees... but the bus looks SO much better. This is the first time I gave her a washing.
Sunday, May 18, 2014
Today the weather was unseasonably cool which made a great day to take the bus out for a drive. The last time the bus moved was last Sept so it has been about 8 months. Way too long. We drove the bus down to Love's Truck Stop in Richmond and back... she did perfect, as usual. The air dryer purge valve that we installed a couple of weeks ago works great and purges just like clockwork. The bus looses a lot less air than it used to.
The next project will be trying to locate the source of the fuel tank leak that I had this past winter. It has not leaked in several months now but I figure if it leaked once it may just leak again and I can't afford that to happen while on the road.
The next project will be trying to locate the source of the fuel tank leak that I had this past winter. It has not leaked in several months now but I figure if it leaked once it may just leak again and I can't afford that to happen while on the road.
Tuesday, May 6, 2014
In my last post I mentioned that the purge valve that I rebuilt did not work properly... actually stuck open and purged continually preventing the building of air pressure in the system. Today I took the bottom part of the air dryer to Charlie and Bluegrass Tours for advice. He looked at it and immediately knew that I had put part of the valve parts in reverse order. Also the bore where the parts go was scored badly. Charlie had some parts from an old air dryer that were in better shape than mine so we swapped out some old parts of his with some parts of mine. He reassembled the valve for me. I took it back to the bus, installed the end assembly, aired up the bus, and it worked perfectly. The bus now airs up, and the purge valve purges and seals like it was designed to do.
After putting everything away, and getting the front of the bus down on the ground from where it had been sitting jacked up and on wooden blocks I started it up... the last time the engine was run was back in Sept 2013... so it has been over 7 months... I cranked it until oil pressure built up and then I released the fuel shutoff and she fired right off.
Maybe if I can arrange it, I can take the bus out this coming Sunday for a short spin. Now I can check this project off my list.
Sunday, May 4, 2014
Toward the end of last Sept 2013 I should have made a post here about having an issue with the purge valve on the air dryer sticking open. This issue made it impossible to air up the bus and if you can't air up the bus you can't unlock the brakes and move it. I removed the air dryer completely, which is not necessary just to remove the purge valve but I wanted to inspect the complete air dryer as I had no idea what shape it was in.
 The air dryer was in good condition. I ordered a repair kit for the purge valve. It took several weeks to get the kit and by that time I was too busy with work for several weeks to get back to working on the air dryer. After that the weather would not cooperate. Either it was raining or just too cold. This lasted until May with one of the worse winters we have had on over 10 years. I am limited to the weekend to really do much work on the bus normally and with my tax prep business I was swamped with work from Jan through the end of April anyway. So just lots of reasons I could not work on the bus again until May.
Finally warm weather is here to stay and today I attempted to install the purge valve kit, new internal 'dryer bed' canister and then install the complete air dryer back on the bus. The assembly sits just forward of the front axle in the center and you have to jack up the front of the bus to have room to get in there to work. It is an ordeal just to properly jack up and block up the bus safely.
At any rate, the dryer is back on but the purge valve still leaks. It has also been so long since I took it all apart, I honestly can't remember for sure how the bottom of the canister is fastened on. I again removed the bottom assembly of the canister and will take it to Charlie at Bluegrass Tours tomorrow for his kind instruction and hopefully he can tell me what I have done wrong.
Once again, it's one step forward and two back.
Sunday, July 21, 2013
I decided to take the bus out for another run today because it was overcast and some chance of rain off and on. Since the bus does not have an air conditioning I try to pick cooler days to drive. Today ended up being about 82 for a high and about as much humidity. I drove back down I-75 south from Lexington to Williamsburg Ky and back. Total it was about 202 miles. Once again the bus ran flawlessly.
The only real snag was with the new dash fan I installed a couple of months ago. This is the first time I've actually got to drive and use it and it really helps just in moving air around. I have a small leak somewhere around the windshields when it rains heavy. Every time it does, I have a small puddle on the dash dead center. That is about the place I ended up putting the fan. I've never been able to pin point where the leak comes from. When I turned on the fan today it would not run. The first thing I checked was power, which was ok. Then I turned it on and spun the blades. They were really stiff to turn but after a few attempts it took off. I could use the fan for about 20 minutes or so and then it would start to slow down a bit and start making extra noises so I would turn it off, let it cool and try again later.
At this point I don't know if water got inside the fan motor or if it just has bad bearings. Either way, it is pretty much useless and I need a new fan.
Today at the turn around point and again when I got parked back in Lexington, I took my infrared thermometer and checked several temps on the bus. I noticed the left front brake drum was 25 degrees hotter than the right. The other issue is the left (street side) exhaust manifold on the engine is about 65 degrees hotter than the right (curb side) manifold. I am not sure why, but I suspect that one bank of cylinders is doing more work than the other and probably the fuel rack needs adjusting.
Otherwise another flawless bus run.
Sunday, June 30, 2013

Today I decided to install the 24V fan I purchased a couple of years ago. At this point I don't have any way to power the electric roof top a/c so I get pretty hot and uncomfortable driving when the sun is shining unless it is a cloudy day. Even though the fan will just blow hot air around, it is better than nothing at this point.
When I started looking for a fan I realized how few 24V products are readily available these days as most of the trucks on the road use 12V equipment and my bus is of the vintage that everything was 24V. However I did find a place on the internet that had the fan. This turned out to be a very decent fan and even has two speeds. I"m pleased.
Monday, May 27, 2013
I had the bus out for a short run around town Sunday the 19th but I forgot to make a post here. That was the first time I had started and had it out since January. SO, today I wanted to go out again for much longer run. Barry and I took her down to Livingston Ky, ate lunch at 909 truck stop, and returned. Round trip was 138 miles. Once again the bus ran flawlessly. This engine seems to run on the cool side and it take quite a while to actually get it up to 180 degrees. I noticed that after about 30 minutes on the interstate and after pulling a few good hills she seemed to run even better and the engine seemed to pull better.
By the time we got back the temp in Lexington was 82 and sunny... which made for a very warm ride without any air conditioning. I really need some money or a very good deal on a generator so I can run the front roof air while driving.
I am so pleased with how this bus consistently performs. I have quite a few pesky air leaks that I need to work on but nothing that prevents running her down the road.
Saturday, January 12, 2013

At any rate, when I started her up today, I noticed a pretty good air leak at one of the air/electric valves in the engine room on the rear bulkhead. I figured it wasn't so bad that I could not drive her so we went out anyway. By the time we made our fuel stop at Love's in Richmond, it had stopped leaking, so just another indication that the bus needed to be run. Sitting is very hard on them.
Today diesel was $3.94/Gal at Love's Truck stop and it took $399 and change to fill the tank. The bus ran great, as usual. Driving in the rain gave me a chance to actually run both air wipers. The right side is a little finicky but they both work and do the job. The left side wiper has a soothing rhythm to it. So another successful little jaunt down I-75 and back.
Sunday, September 23, 2012
Sunday drive for fuel
No picture on this one. Barry and I took the bus out again for a leisurely drive down I-75 S to Berea, again, to get some fuel and eat lunch. Once again the bus ran fine and the trip was without incident. We both had chili and grilled cheese sandwich for lunch at the Union 76 truck stop on us21. Really nice people there and the food is good. I bought $98 and change of diesel for $4.12/gl. Going back home I noticed that the Love's had it for $4.08 cash price but for what I bought the .04/gal only added about a buck to the total.
I did notice some air leaks today that I need to track down and fix but nothing serious.
I did notice some air leaks today that I need to track down and fix but nothing serious.
Sunday, September 2, 2012
No pic for today. I decided it was cool enough to take the bus out again. This time I went out by myself and just drove around downtown Lexington practicing my turns. All totaled I only went approximately 19 miles according to the GPS but that took about an hour including air up time and parking on return. Once again, the bus ran fine and I did ok with my turns. I would like to get them a little tighter though but that will come with more practice.
Sunday, August 12, 2012

Any time the bus sits for a long time I start from the rear just in case anything goes wrong. I am glad I did, because when I first started her up the governor hung and she tried to wind up too fast, so I immediately grabbed the fuel shut off and pulled the rack down. I did that several times and worked the throttle before the governor loosened up and took control correctly. After that she was fine. Just goes to show that these beasts don't like to sit a long time. Other than that, she ran great to Berea and back with absolutely no problems. This was also my first chance to really get the feel of the steering since I had all the front end work done in Georgetown over the winter. It still required work to keep in a lane but it is markedly better than before. All in all I was pleased. Barry and I plan on taking the bus out every week or two if possible for small runs. At some point I'd like to drive down to the Tn state line and back, but we'll see.
Friday, May 4, 2012

6 months, almost to the day. They did a lot of work... most was mentioned in a previous post. The bus ran fine on the drive back to Lexington and I could tell an improvement in the steering but it still has quite a bit of play in the wheel. They replaced all the major steering components except the slave cylinder and steering gear box. It is still work to keep it in a lane properly at highway speeds, but better than it was before. I am glad to have it back and with lots of luck and money, maybe I can get to work on the inside some this summer.

Me backing the bus in the lot where I keep the bus.

Thursday, February 23, 2012
My last post was in November when I drove the bus to Bluegrass International Trucks & Buses for repairs. They have had the bus finished for about three weeks now. Today I was finally able to get a corrected invoice from them so I could settle up. The original estimate was for $5700 and change for all the work. However the initial bill came in MUCH higher than that... almost three times. However the service manager wrote down enough of the labor to make it more reasonable. Still over the estimate by $2300. Looking back at all the work they did, I knew they could not stick to the original estimate. While the final bill of $8027 is hard to swallow, I do feel it is more reasonable.
I knew early on that they were having a really rough time in the R&R. Some of these components had probably never been removed in over 30 years of service, so beating out, pulling out, heating, and drilling out was the norm in almost every instance. James the mechanic that did almost all the work, said that nothing was coming apart easy. So that told me that the labor hours were going to end up much more than normal. Ok enough of that.
The breakdown is:
$1593 to replace all inner and outer drive studs, remove drums and the complete brake assemblies on both drive axles, check bearings, brakes, and all related components.
$2530 to replace two slack adjusters complete, 2 s-cams, all cam bushings and 1 DD3 brake actuator, and 1 brake line from relay to can, and replace wheel seals on both drive axles.
$1866 to replace both king pins from front axles, replace drag link and tie rod . Replace wheel seals and adjust brakes.
$960 to replace bearing assembly complete on street side tag axle, and replace seals on curb tag.
I still have a power steering leakage at the quick connect fittings in the engine room I want them to look at before I pick up the bus. They also made me aware that I will need new axles and bearing on both drive wheels at some point before I start to do a lot of driving as they are worn, however I elected to not do that just right now. The bearing are not spinning yet. Axle surgeons will probably be the guys to actually do that work.
With a little luck maybe I can finally make the trip to Fred Hobe's in Florida to change out the steering gearbox and steering wheel assembly in early summer. At any rate, right now she is much more road worthy than before. Now it's all about credit card payments on all this.
Wednesday, November 2, 2011
Yesterday I drove the bus to Bluegrass International Trucks in Georgetown KY to have them replace the studs on the drive axle, inspect the brakes and adjust the slack adjusters, and check the wheel bearing and oil seals. Let me know if you find anything else, was my last instruction.
WELL... they found more and called me late this afternoon for me to drive over and take a look. Bad bearings on one tag axle, which I suspected. Bad input seal and flange seal on the differential, which I knew about already. Brakes ok except for the slack adjuster mechanism on both drive wheels... has play in the slack adjusters and s-cams. The drive shaft universals are badly worn and possibly the yokes are out of round... might need a new drive shaft. The last items was up front with the steering. Worn tie rod ends, but more importantly BADLY worn king pins on both sides. With as much play as he showed me on the king pins, no wonder she wandered in the lane and had lots of play in the steering wheel. They are calling "axle surgeons" (yes a real company) to come out tomorrow and inspect the king pins. Might have to have new front axle ends put on.
I think I hear a big sucking sound coming from my wallet. Ben from International will give me estimates on the rest of the work tomorrow. I am REALLY impressed with the work they have done so far and the thoroughness of the inspection. Both Ben and the mechanic James seem to really know their job and take pride in their work. I highly recommend them.
Looks like my planned trip to Florida to work with Fred Hobe is put on hold for a bit.
Tuesday, October 25, 2011
The guys at Bob Somerel Tire in Winchester Ky were absolutely great. On my initial visit the guy worked with me for almost two hours answering my questions and pricing tires. He also gave me a tour of their recap operation. I found that very interesting and played a big part in my final decision to go with bandags on the rear. The two guys that did the change out today were professional and knew what they were doing. They both also answered any questions I had. None of this was anything like I have ever experienced before when buying tires for my car. The icing on the cake was when they pulled out the torque wrench to torque my studs. They did the same to the Kenworth they worked on before my bus.
In the process of the change out though, they showed me several really bad studs on the drive tires. They are not equipped to change out studs as all they do is tires, but he recommended a couple of places for me to call. So 20 new studs on the drive tires are next on my list. I don't know if this is something Barry and I want to tackle or not. It's not rocket science, but these tires are HEAVY and very hard to handle. Not sure my knees and back are up to the task. We'll see. Either way, they have to be done before our upcoming trip to North Florida for steering replacement.
I thought back to the last time the drive wheels were taken off and it was last summer when the bus was in the shop at S&S Truck Center in Lexington. They took off the drives to replace a couple of radius rod bushings. The didn't give me any notice at all about the bad studs... they just put them back on. Only part of the reason I'll never go back there. I don't understand people and businesses that do not take pride in their work and will just put anything out the door. Only part of what is wrong with this country today.
Back to a positive note... all in all a good day. This is the first road trip for the bus in a year and she did flawless. I am so pleased.
Sunday, October 23, 2011

 However, as Barry is known to do OFTEN, he did not show up. We were supposed to do it last Sunday too, but he felt it more important to go to Court Days in Flemingsburg. I do not want to do that job alone and I could use his muscle too to help, so I spent the afternoon cleaning up the inside more, removing the old carpet and padding, and then testing my air horns that I bought last summer.
 From the pictures you can see the carpet is all gone. I tested the horns with my air compressor and jumped to the batteries, and they work. They are even dual voltage. At some point I'll need to install them but that will be a lot of work as I need to tie to the air system and the electric. Currently I have no horn on the bus.
Sunday, October 16, 2011

I lucked out in getting these three visors. Charlie @ Bluegrass Tours gave them to me. He had a MC9 that had been sold to a guy for scrap and so he removed them for me. Only thing is, he did not get me any mounting hardware so I have had to make that up as I went.
Now if I can only get one of the remaining bracket removed I can install the last sun visor.

Saturday, October 15, 2011
Parking Brake Valve Completed

Sunday, October 9, 2011
24 volt socket

I purchased an auxiliary (cigarette lighter) socket online and yesterday I installed it. I disconnected the indirect lighting circuit as all of those lights were long removed with the normal bus interior and this circuit has a switch and is fused at 20 amp with a circuit breaker. I competed with wiring and tested it today with the GPS... all works perfectly. I added a label above to show this is for 24 volts only to prevent anyone from attempting to use it for a 12 volt device like cell phone or laptop charger. This really will be a single purpose socket. It is also mounted at the drivers panel next to my left knee, so it will be out of the way of other people anyway. So in the event that I EVER get the bus on the road, I'll have the help of my GPS and can plan routing, watch speed, and can keep up with mileage. At this point the bus has a speedometer but I am not sure how accurate it is and it has NO odometer so without the GPS I have no way of tracking mileage. Finally one step forward.
Air brake issues hanging like a dark cloud over me.

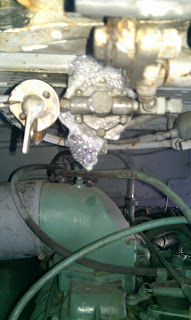
I have removed, inspected, and reinstalled the QR1 valve numerous times over the past several weeks. Since I had not made an progress I saw no sense in making blog posts. I am trying to figure out why I still have a slight air leakage out the exhaust port when the parking brake is applied. I looked at other parts of the air brake system and found the parking brake (push-pull) valve leaking out the bottom so I ordered a new one from Luke @ U.S. Coach for about $115. I feel that most of the parts I have had to replace on the bus, so far, have been fairly priced especially considering their size. The one part that is priced like gold, however, is TIRES. I'll get back to that topic though in another post to come later.
Yesterday I attempted to replace the parking brake valve shown in the picture to the right. It has three air lines that were originally copper. This valve fits in a small compartment to the right of the driver next to the transmission shifter and access is made more difficult by the fact that the driver's seat is right next to it. I attempted to install it twice. I never did have much success getting it lined up to fit in the bracket mostly because of the rigidity of the copper lines and also because the new valve threaded top is just slightly larger than the original one and doesn't fit in the hole in the mounting bracket.
So today I removed the three copper air lines completely, marked them as to location and purpose and this week I will go get some plastic DOT air line to replace them with. This will be much more flexible and the reinstallation of the valve with the new air lines should be a piece of cake. I drilled out the mounting hole just a bit and now the threaded top of the new valve fits in the bracket perfectly.
Before I removed the valve though, I started the bus and ran the air system through its paces to listen for other obvious air leaks and check the operation of the air dryer purge valve and the cut-in/cut-out pressures on the air governor. I could hear a decent air leak from around the rear axle which makes me think further that I have one of more brake cans leaking in the rear. My thought is that the slight air leakage I still have up front in the QR1 valve is possibly coming from the same rear brake cans. It seems so much of the time I get one step forward and then take two back. None of this will fix itself and I keep saying I should be thankful to find this stuff now at home base than in the future on the side of the road.
Monday, September 5, 2011
QR1 and pressure regulator valve repairs


After finishing the QR1 valve, I removed, rebuilt, and reinstalled the pressure regulator for the blower belt tensioner. Here is a picture of it NOT blowing bubbles after the rebuild. Only problem is, it STILL leaks too, just not as bad. No nest of bubbles, just leaking out the tiny weep hole in the back. I am researching that one too, but feel that the problem may be a leaking tensioning air cylinder and it comes out the weep hole. Hopefully I can update with the fix soon. The regulator is at the top of the picture and the air cylinder on the right side.
Tuesday, August 30, 2011
Air leaks
Today was the first chance I've had to do anything to the bus in a couple of weeks. I have started it the past two Sundays and moved it around the lot a bit just to stir fluids up, but that has been it.


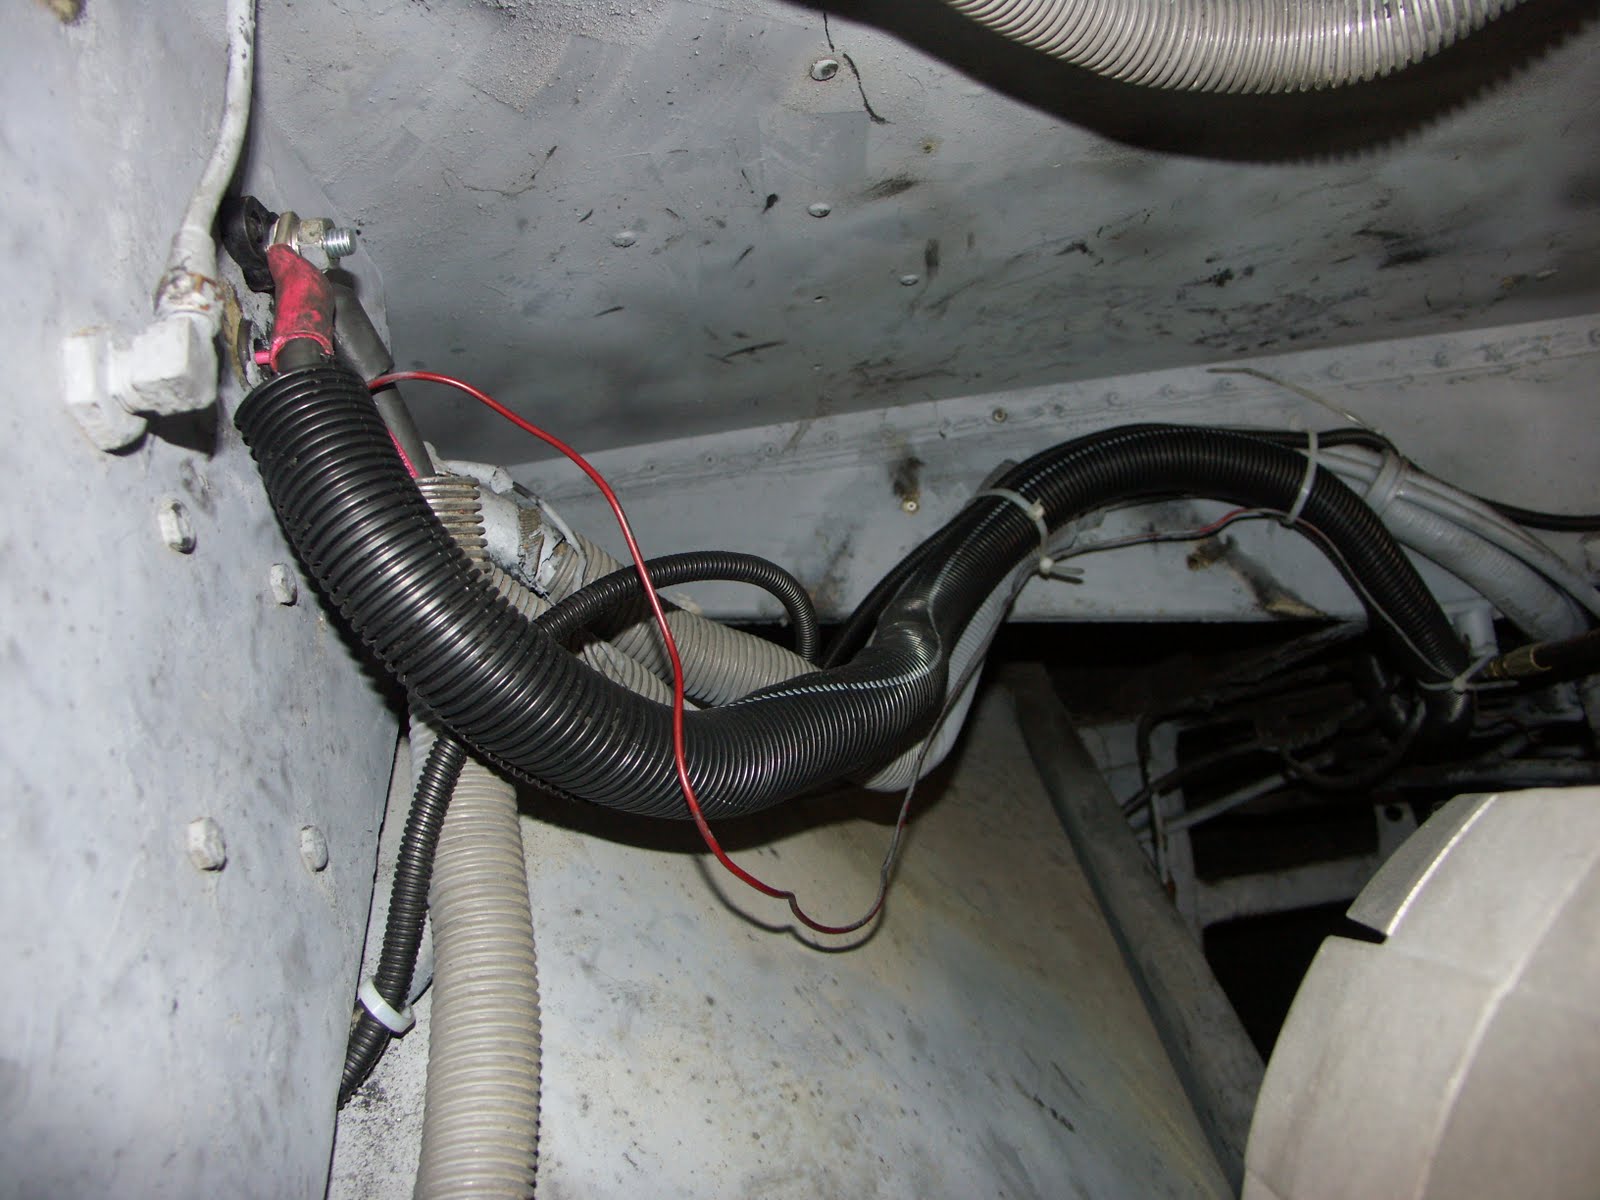
Last Sunday I noticed that after I shut down the engine I could hear lots of air leaking from under the front. So today I started poking around with my soapy water bottle to see what I could find. Found a fitting or two that needed tweaking but the big culprit was the silver square thing in the picture. Later found it is a quick release valve (a part of the air brake system) and it is leaking out of the side. A call to Luke and U. S. Coach told me what it was and he is sending me a rebuild kit for it.

For some time I've had a leaking pressure regulator for the blower belt tensioner but I had no idea it was leaking this bad. While soaping down fittings, I came to the engine compartment and inspected a few. The regulator is leaking hugely as you can see by the large bubbles it blew. Luke has the rebuild kits in stock for this too and is sending it to me.
Tuesday, August 16, 2011
Bad wood in the rear

LaRon took a load of debris to the dump today. That allowed me to clean up the rear end and move things around a bit. First item on the list was to inspect the cause of a soft spot in the pergo flooring, curb side, in the bedroom. I removed a piece of the flooring and just as I suspected, found bad wood. I ended up removing all of the pergo flooring as the more I removed the more bad areas I found. You can see the worst area in this picture to the right. The wood there was still very wet and spongy. Parts of it pulled away like tearing a sheet of paper.

The question now is how much is bad and how deep. I spent the rest of the afternoon removing the bad plywood on top of the original bus floor. You can see in the picture here that the damage goes all the way across the bus to the other street side wall. While the wood is not wet on this side, I decided it best to remove all damaged sections.

Here I show a picture of the bad plywood all cut out of the bedroom area. The original bus flooring seems to be ok here except for the two spots at the back wall where the blue covering is missing. I removed the bus plywood floor, which was dry but still rotted, exposing the metal sheeting below. The metal sheeting is in rough shape but it is not structural so it should be ok. While the bus floor is definately showing it's age I believe it to not require removing. I am not sure what I will do next. I need to remove a couple of sections of the metal wall covering under the windows to inspect inside the wall and the framing. I suspect that I'll find rust in a few areas. Stripping the conversion out of the inside of the bus has been a big undertaking and it pretty much brings the project back to square one. Finding the bad and still wet wood today reassured me that the tear out is necessary. It can look pretty on top but be rotted below.
Saturday, August 13, 2011
Kitchen out

Water heater out

Sunday, August 7, 2011
Kitchen mostly gone
 Today I managed to demo most of the remaining kitchen cabinets and counter area. Removing the cook top was not much of an issue. On the label shown below it says the unit should not be any closer than 6" from the center of the burner to the closest combustible material. It was placed exactly 6" as stated, but the outside of the burner was only 1" from the adjacent wall and that just looked way to close for my comfort. So on the rebuild I will place the unit further than this from the sidewall.
Since the countertop area is not large, I am thinking about moving the sink down more toward the other end of the counter and thereby leaving an open work space in the middle between the sink and the cook top.
The three burner cook top shown here should be adequate for our stove top needs, but with this we will not have an oven. The other option would be to get an apartment size gas stove which would have both but I think in the mean time I might just use this cook top and the small electric countertop convection oven I have at home. I am not a fan of the microwave at all so I have no plans on including one of these.

From the picture here you can see I have quite a load to go to the dump. I have already arranged with LaRon to take a load Tuesday. As it turns out it looks like I might have two loads. I still have the base of the kitchen cabinet left and half of one partition wall to still come out. After I clean up the inside of the small stuff and sweep it out good, then maybe I can start work on removing part of the bus ceilling and old fiberglass insulation.
Here are before and after pictures of the kitchen.


Tuesday, August 2, 2011
New gauges


 When I bought the bus it did not have a volt gauge in the dash or an oil pressure or water temp gauge in the rear engine room. While the volt gauge is not a must have, the other two are. So when I first put the bus in the shop at Republic Diesel for those oh many months, I had them install the direct oil pressure and water temperature gauges in the rear. That way I know for sure what the correct readings are. Old dash gauges tend to not be nearly as accurate.
Saturday, July 30, 2011
Tearing out more of the bathroom


Sunday, July 24, 2011
Begin bathroom tear out
Today I finished removing the street side wall separating the bedroom and bath.
 You can see here that the wall next to the sink is missing and the sink is still attached. Removing the sink from the wall was on of the easiest tasks in this tear out so far. Only two screws remained after the wall was out, I went below and disconnected the hot and cold water supply lines, then came back up top and cut the waste line with the saw-zall in a convenient spot.
 Here you see the sink before it was removed as well as the placement of the existing toilet and wall. These pictures will be reference points for me when I begin the rebuild. I suspect that the sink, toilet, and shower will all go back in the original places.
 In this picture you can see the curb side dividing wall is gone and how the shower stall was framed on the one side. Once the sink was out, I began to dismantle the shower stall door. I think I worked well over an hour just trying to get all the screws out and beginning to cut through all of the caulk and sealant. I managed to remove the door, the top and right side railing but could not get the left rail out because the blade broke in the cutter I was using to cut through the caulk. Tomorrow I'll make a trip to Home Depot and buy some more blades and work on the shower door some more. The door looked very nice, but I'm not sure I will go back with it. It will take only a few minutes to remove a shower curtain as opposed to the hours of labor to remove the door and all the trim pieces. We'll see when the time comes to put it back. I was getting tired and figured this would be a good stopping point for the day.


Saturday, July 23, 2011
Finish bedroom tear out
Barry and I finished tearing out the build in the bedroom and started removing the walls separating that and the bath. The curb side wall is all out and also that side wall covering. I started removing the street side wall, but only got half way done with that before the heat just became too much.
I turned on the front roof air this morning and it was ok for a while, but after the afternoon sun rolls around the bus begins to bake. With the bus not very well insulated, which is one of the reasons for the tear out, the a/c cannot keep up. By the time I quit it was 89 inside and I had done enough for one afternoon.
I turned on the front roof air this morning and it was ok for a while, but after the afternoon sun rolls around the bus begins to bake. With the bus not very well insulated, which is one of the reasons for the tear out, the a/c cannot keep up. By the time I quit it was 89 inside and I had done enough for one afternoon.
Thursday, July 21, 2011
Starting the tear out
With the fuel prime issue resolved and the engine once again running smoothly I'm on to new tasks. I have decided to completely strip the inside of the bus down to the metal framwork in the walls and ceiling. I want to see what rust lurks behind the walls and fix it in preparation for spray insulating, removing windows, and reskinning.
 Today Barry (sometimes we call him Patch) and I started stripping out the bedroom. Barry has been a God send and is always there to help me with the bus. We compliment each other well and between the two of us, and the internet "bus boards" as I call them, there is not much we can't figure out. The previous owner did a good job of building parts of the inside carpenter wise, just not that I wanted in some areas and also I did not agree with some of his wiring methods. So for several reasons I've decided the inside must go and be redone. What is making the tear out so difficult is that the P/O glued and screwed every piece of wood installed. He surely had no intention of ever tearing any of this out. So it is all a struggle. I'm trying to save any good wood that I can, especially the oak pieces, but some just can't help but be ruined. If only he had not glued everything.
We are in a heat wave, as are lots of parts of the midwest, this year. The high today was 96 with indexes in the 108 range. After 4 hours this afternoon in the bus (even with one a/c running) we were both exhausted and ringing wet. We got all of the bunks tore out and when we get back to it we'll finish the remaining wall and ceiling siding, trim, and start on the wall between the bedroom and bath.

We are in a heat wave, as are lots of parts of the midwest, this year. The high today was 96 with indexes in the 108 range. After 4 hours this afternoon in the bus (even with one a/c running) we were both exhausted and ringing wet. We got all of the bunks tore out and when we get back to it we'll finish the remaining wall and ceiling siding, trim, and start on the wall between the bedroom and bath.
Saturday, July 16, 2011
Gentlemen, start your engines
Today, I finished up the installation of the new spin-on fuel filter assemblies. After that, I reprimed the fuel system with the nifty garden sprayer priming system that I put together and then attempted to start the engine. After the priming equipment was removed and the main supply line filled and hooked up, I hit the starter switch and she lit right off just like a good detroit diesel should. Purred like a kitten. I let her run for probably 10 minutes at a high idle and checked over things looking for obvious problems. Everything looked ok so far and no leaks showed.
I also took the time to check the output on the new alternator installation at a high idle. The alternator was putting out voltage so it appears to be ok too, I'll just have to live with the no charge at idle situation for a while. It appears that the real fix for that might be having to move the alternator to the other end of the engine and driving it off the crankshaft pulley. For now I'm leaving it where it is and will just be conscious of my low idle time and chassis electrical demand.
The bus will sit overnight and tomorrow we'll see if the prime has held. One thing for sure, the new spin-on filters are SO much easier to fill and install than the old canister type that I removed. If I ever have the need to reprime the system again, I have the equipment to do it with.
Friday, July 15, 2011
New Fuel Filter Assemblies

I installed the new spin-on fuel filter assemblies today. I picked up the new brass inverted flare fittings that I ordered yesterday from Republic Diesel. 8 fittings were just under $40 dollars. Since I buggered up the threads on one of the old fittings trying to remove it from the old primary head, I decided I would get new fittings and install everything new except for the hoses. Several weeks ago I ordered a fuel pressure switch which was missing from my bus. You can see it to the right of the secondary filter ready to have wires attached. This switch prevents the starter from engaging after the engine starts. I managed to get all the fittings except one in and the heads mounted before I quit for the evening. Tomorrow I plan to install the remaining fitting and prime the fuel system.

All of the fuel hoses looked ok except for the inlet hose from the bulkead fitting to the primary filter. As you can see in the picture to the right, the hose is beginning to crack on the outer casing, so I went to BG Rogers and had them make a new fuel hose for me. After I get the system primed then I will install this hose as the final piece.
Thursday, July 14, 2011
Converting to Spin-On Fuel Filters
Several days later I went to see Charlie at Bluegrass Tours (my go-to guy for bus repair advice). He suggested I go to Republic Diesel for the spin on conversion heads or maybe even a truck junk yard. I decided to skip the junk yard route as I've never really had much success there. They are the only truck/heavy equipment junk yard in town and they seem to not have much in the way of the old two-stroke stuff. So I went to Republic Diesel, late Tuesday and ordered the primary and secondary filter heads. The heads were about $65 each with the filters being $6 each, which is almost half the price of the filter elements for the old canisters.
I made it out Thursday to pick up my parts and started to remove the old heads later that afternoon. I now have had a lesson in just how soft brass fittings are as I buggered up one of the 90 degree induced flare fittings trying to remove it from the old primary head. These fittings have probably been in place for 35 years. So all comes to a halt once again.
I made it out Thursday to pick up my parts and started to remove the old heads later that afternoon. I now have had a lesson in just how soft brass fittings are as I buggered up one of the 90 degree induced flare fittings trying to remove it from the old primary head. These fittings have probably been in place for 35 years. So all comes to a halt once again.
I went out to BG Rogers on Georgetown Rd to see if they had the assorted 90 degree fittings that I needed as at this point I was going to replace them all and have a spare or two for the future. BG Rogers is the one that made up my new rubber fuel supply line that runs from the bulkhead fitting to the filters. However, they did not have the induced flare fittings in stock. My next stop was Republic Diesel, once again. They also did not have them, but would order. So I ordered them and should have them tomorrow. So maybe Friday afternoon or probably Saturday I'll hopefully get back to installing the new fuel filter heads, filters, and repriming the engine fuel system.
Sunday, July 10, 2011
Lost Prime
In my previous post about the alternator issues, I mentioned that the engine lost prime. Sure enough, after removing the two fuel filter canisters they were half empty. Classic case. I purchased two sets of filters at O'Rileys a few days later. On Saturday the 9th after finishing work, I attempted to install the filters, fill the canisters and install on the engine. The secondary filter went ok, but I never was able to get the primary on correctly. The filter element didn't appear to sit right and the canister would not pull up to the head properly when I tightened the center bolt. When took it appart for the last time and removed the filter element, the bottom of the element seal and flange was stuck in the bottom of the canister, with what now appear to be the previous element seals too. I could not remove them, so next week I plan on getting a conversion kit for "spin on" filters and get rid of all of the canisters. Working with the canisters is a royal pain, laying on the ground, with your hands over your face, pushing up on spring loaded, partially filled fuel canisters. More to follow when I get the new parts.
New Alternator


After several months of work off and on around working and the weather, I finally got the job completed and was ready to start up the engine and test the alternator. Started it up Thursday the 7th of July... lit right off and ran for about 5 minutes then started to faulter and die. I suspect that I'll find the fuel filter canisters partially empty, which means she has lost prime.
For the brief few minutes that she ran, I hooked my meter to the alternator and was not getting a charge at idle. At first I thought something was wrong, but after researching the specs on the new alternator, I think my problem is lack of idle RPM's for the alternator. The cut-in RPM is 1400 and it turns no where near that at engine idle. The driven pulley diameter is 3" and the driving pulley diameter is 5", which means the alternator will not get up to 1400 RPM or better until the engine is at about 850 RPM.
I suspect when I get the lost prime issue resolved and the engine running again, that when I increase the RPM's that the alternator will put out the proper voltage. I am not sure of the options of either increasing the driving pulley diameter or reducing the driven pulley diameter, but either way would help the alternators idle RPM situation, but that is another battle for another day. At this point I can live with it the way it is for a while as I have more important issues to resolve.
Wednesday, May 11, 2011
First the GMC buffalo, then the MCI 8
This is my first blog, so bear with me as I climb the learning curve. My purpose for the blog is the document our trials and tribulations of owning a used intracity coach and finishing the conversion into a reliable motor home.
 My first bus was a 1980 GMC model that was not without lots of problems. Had I known then what I know now, I never would have made that purchase. I never finished that bus and I ended up selling it to a gentleman in Tennessee who wanted it just for parts. The city of Lexington was forcing me to remove the bus from my driveway because it was against code to be parked here. The bus needed to be completely behind the front line of the house and my driveway was not long enough to do that. With the economy in the toilet, this was NOT the time to attempt to sell an old retired charter bus and especially one that needed repairs in order to run.
Just before I made that sale of the GMC, my best friend Matt found a mostly finished MCI model 8 bus in Winchester that was for sale. The end result of this is that I purchased the MCI and began my new endeavor,with much more seriousness this time.
 The MCI needed a few maintenance items right off the bat, so I put it in the shop at Republic Diesel for what turned out to be approximately 9 months. Then At that time I was not in a hurry anyway, because i wasn't sure where I was going to park it, so it all worked out. After this, I took it to S&S Truck Center to have the steering checked out, the front end, and have some radius rod bushing replaced. They kept it another couple of months doing this. They told me the steering gear was worn out and needed to be replaced. They also replaced the two front tires at a tune of $996 for two steer tires, mounted and balanced.
Once I got the bus back I started poking around and planning on the necessary changes to the interior. I quickly learned that while the previous owner did fantastic job in his woodworking on the interior I had lots of issues with the way he ran the wiring. Consequently I started late last summer tearing out a good portion of his wonderful work to enable access to the wiring and make the necessary changes.
I spent the rest of fall, with Barry as we made several trips out of town to Visone RV Salvage, removing furniture and seating out of a wrecked Bounder, that I wanted for our new bus. So now the furniture is stored in the bays below waiting for the right time to complete that portion of the install. However, that will be one of the last things to do on the inside. Removing and transporting the furniture took us until almost winter to complete. While at Visone RV Salvage, I was able to walk around the lot and look at many wrecked and burned out "sticks and staples" conventional RV motor homes. This gave me a first hand look and how they are made and reassured me just how much more "substantial" a used intracity bus is as compared to a manufactured motor home.

Just before I made that sale of the GMC, my best friend Matt found a mostly finished MCI model 8 bus in Winchester that was for sale. The end result of this is that I purchased the MCI and began my new endeavor,with much more seriousness this time.

Once I got the bus back I started poking around and planning on the necessary changes to the interior. I quickly learned that while the previous owner did fantastic job in his woodworking on the interior I had lots of issues with the way he ran the wiring. Consequently I started late last summer tearing out a good portion of his wonderful work to enable access to the wiring and make the necessary changes.
I spent the rest of fall, with Barry as we made several trips out of town to Visone RV Salvage, removing furniture and seating out of a wrecked Bounder, that I wanted for our new bus. So now the furniture is stored in the bays below waiting for the right time to complete that portion of the install. However, that will be one of the last things to do on the inside. Removing and transporting the furniture took us until almost winter to complete. While at Visone RV Salvage, I was able to walk around the lot and look at many wrecked and burned out "sticks and staples" conventional RV motor homes. This gave me a first hand look and how they are made and reassured me just how much more "substantial" a used intracity bus is as compared to a manufactured motor home.
Subscribe to:
Posts (Atom)